
THIS IS A PARTIAL TECHNOLOGY DEMONSTRATOR AS WELL
PLEASE feel free to make sub assemblies of anything on it, I only ask you credit me!
Just note that most of the base-Mustang is Jundroo's, but loading them side-by-side and you'll readily see what all I've laid my hands on (hint: pretty sure every single part has seen some degree of adjustment, refinement, or modification by me)
Three Weeks of Tender Loving Care...
It all started off as a few simple desires towards Jundroo's P-51-D: to clean up all the lines, and make the cockpit as true to the original as I could on , turned into so, so much more! Key words there was "started off as"....
I had planned (see: hoped) this would be able to be released much earlier, to perhaps be curated, but unlikely to happen since it's hours before the deadline. Either way, while I have a couple additional features I want to add, that will take much much longer, and I couldn't sit on this any longer... not because of the deadline but because I wanted to share it! :P
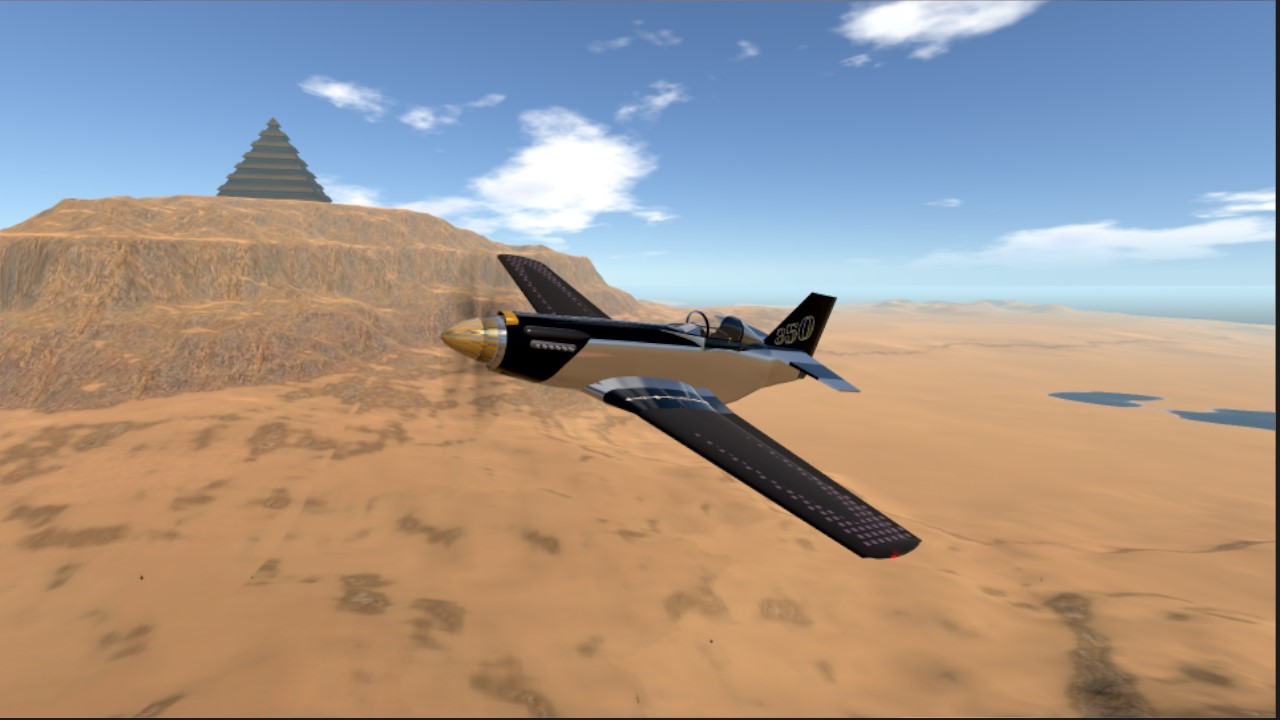
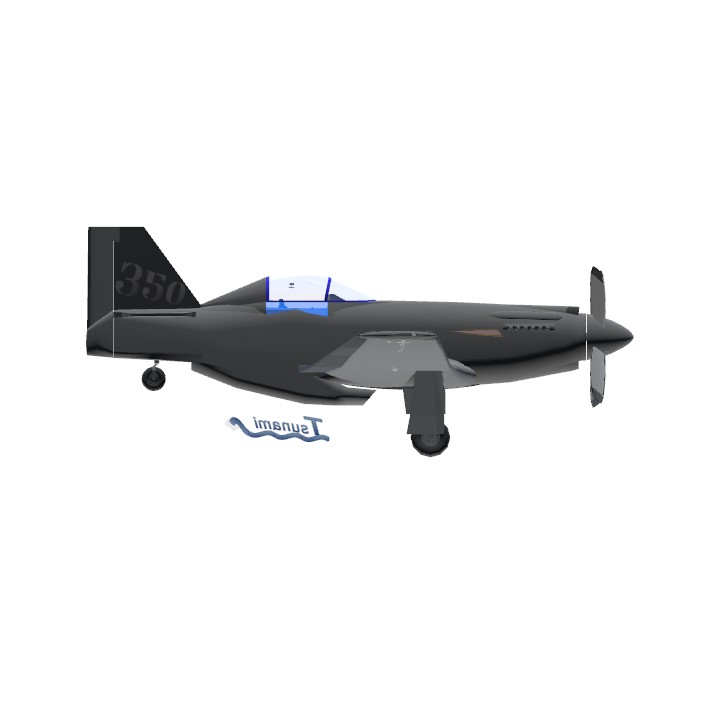
So as I said, it started OFF with simple desires, at least until research lead me down a rabbit hole. Where I ended up was finding the privately funded Racer from the 1980s, called "Tsunami", which I had stumbled across while researching the P-51-D, and immediately I knew I had to shift my focus to make that!

A Quick History on the "Tsunami" Racer
Named after the fact that a Tsunami Wave could potentially (or maybe had been reported to be clocked at) reach in excess of 500 MPH...
That plane set out to break the 3km Speed Record for propeller-driven aircraft, which was just barely 500MPH -- at the time of its creation in the early 80s mind you. Unfortunately in the the owner had a fatal crash in it in 1991, while flying it back to his home state for modifications. Which although it did not officially set the record it aimed to, it was unofficially clocked at over 500MPH, so it had potential! (The wreckage actually was kept in storage and in 2010 actually wasstarting to be rebuilt!)
Design and Changes
I took all the cues for that and applied it to this, giving it the same weight, same engine output, max RPM, and matched almost every other aspect as best I could. After that, I began to make it my own by adding touches here and there. Whereas Tusnami had modified wings, I had put too much time into making the stock ones "smooth" and virtually seamless, so I retained them here.
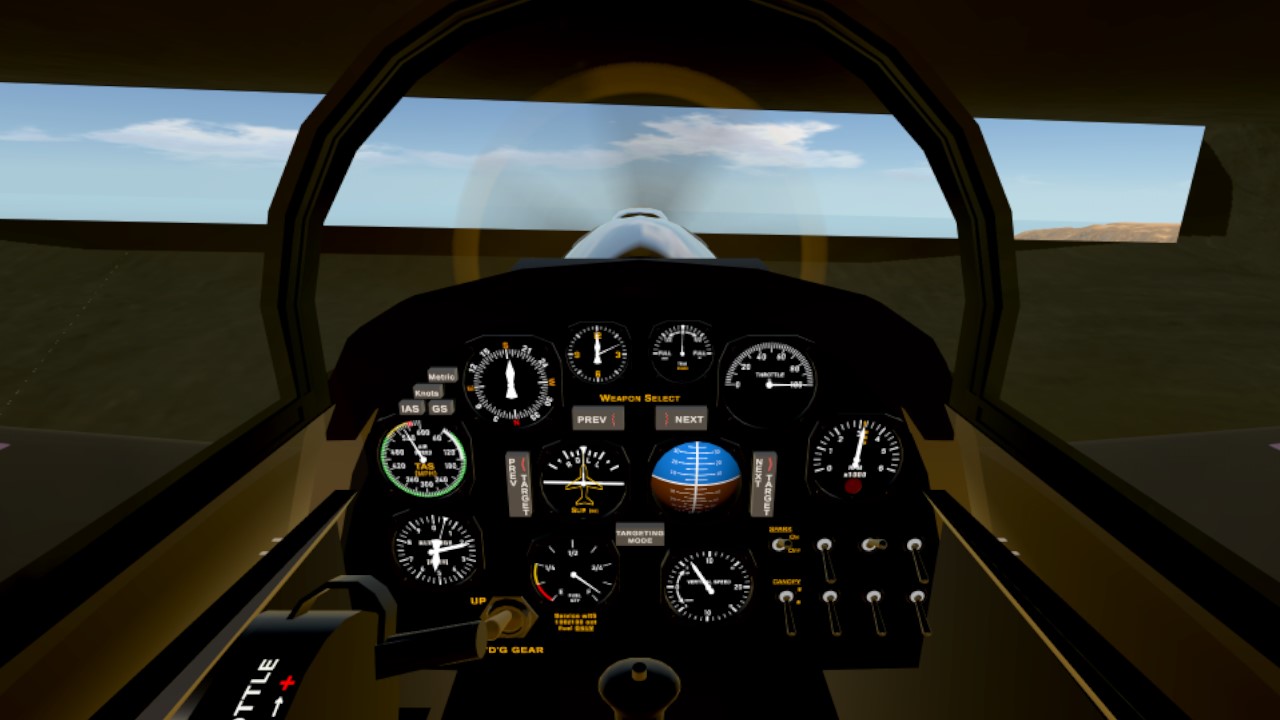
The cockpit I had already taken a bunch of time to complete, modeling it after the original, but adding/removing a few things that we didn't have, and making it more game-friendly; ie moving the Speedo into view.
I took further liberties by adding the recommended buttons to accomodate VR users. As well as giving it some friendly comforts, most of which aren't obvious! This is where the "Technology Demonstrator" comes in, and some of these things are:
- Fixing the RPM gauge to be accurate (taken from my time debugging the new Twin Piston... that I don't know if they're going to include)
- Adding an Engine Warning Light, configured to trigger conditionally
- Hidden Text that illuminates:
- A reminder to retract landing gear
- A warning that fuel is <25%; changing from Yellow to Red when Fuel<12.5%
- A crude "clock" that displays your Flight Time... though I'm not entirely sure it's accurate as the seconds seem too slow lmao
- BEST FOR LAST: The fully user configurable Speedometer, via Buttons! (AG)
- Default: TAS and MPH
- Readout Buttons: GS or IAS!
- Measurement Buttons: Metric (KPH) or Knots!
Thinking outside the (label) box
In addition to that, I wanted to show off some ways to utilize the Labels in unique ways.
First off, the "Rivots" idea goes out to... whomever it was, during the v1.11 Beta... IF YOU SEE THIS PLEASE LET ME KNOW SO I CAN CREDIT YOU!
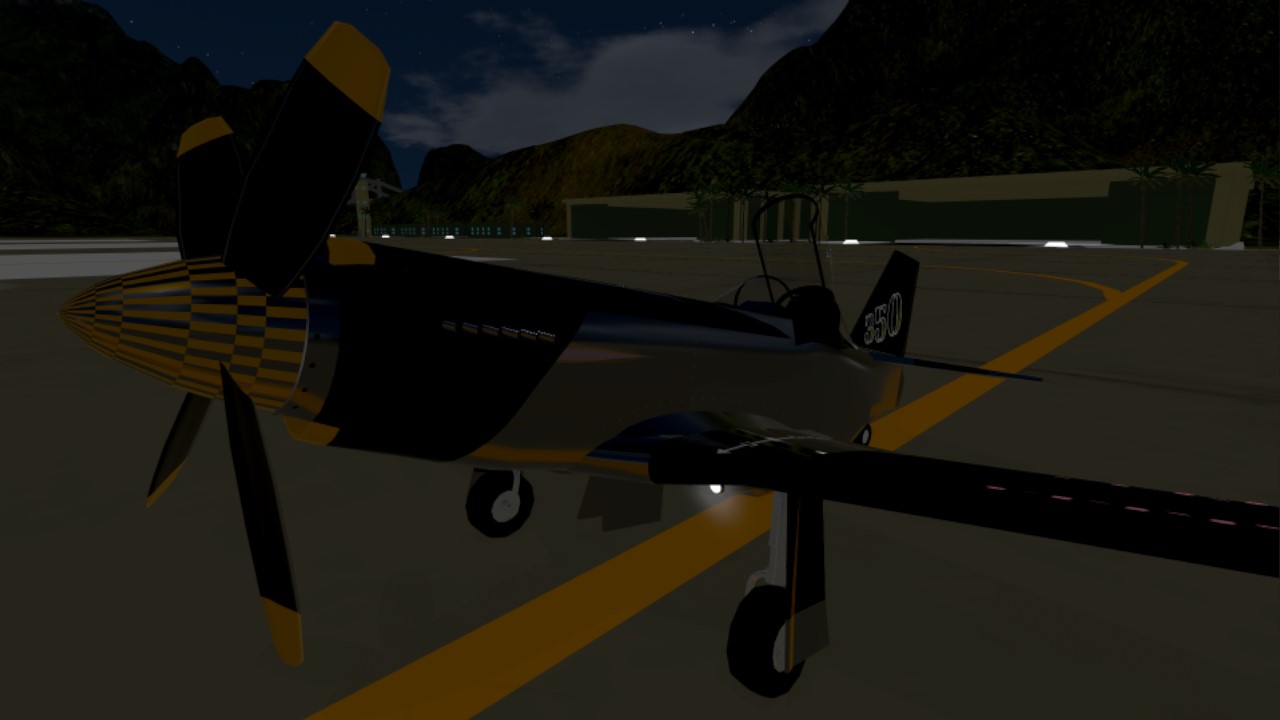
While the idea is not mine, I definitely made the implementation my own by going above and beyond simple rivots made with lots of "period" punctuation marks! Mine are rounded, bi-color, curved, AND arched! Lots of time was taken to recreate the few rivot points on Tsunami, and make them HUG the fuselage as best as possible. I also added one to the front engine cowling, just to show off that one single Label can wrap 360deg. IN TOTAL, all the rivots were accomplished with only 12 labels (both sides). It was originally half that, but I wanted it to be perfect and there was too much gap.
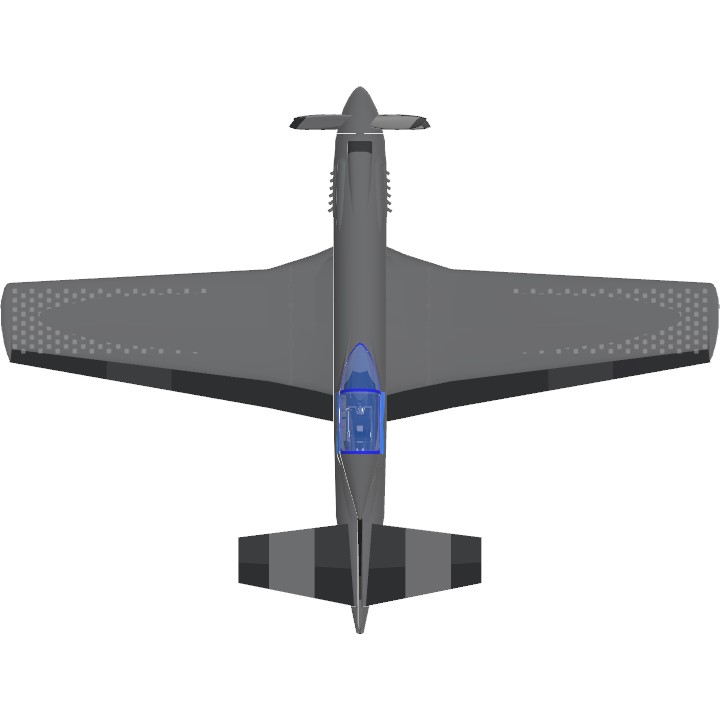
The Wing checkered pattern is 2-labels per wing, with only ONE Unique Character!
This could've been accomplished by 1 label per wing, but meh, was easier this way. :P
"Metal thermal coloring" behind the exhaust ports. I saw on some photos, where planes had stainless protector plates aft of the exhaust, which had gotten so hot they took on the rainbow color. It didn't turn out QUITE how I wanted, but I'm pleased with it. Accomplished with 3 characters, and ONE label each side!
Wing-Stripe "characters" are just a single label each, and those Unique Characters I was able to curve, which was why I used them. (They are "Zero Width Characters" so... they aren't easy to deal with, just keep that in mind if editing.)
Honestly, I only added 'em cuz they looked cool when combined like that, and I don't know what their purpose is from the language they're used in.
Those who know me, know I could go on further, but I'll stop.
THOUGH DO NOTE: THERE IS AN EASTEREGG; IF FOUND IN DESIGNER, BE SURE TO VIEW IT WHILE FLYING!
Controls and Takeoff
Note: A future update will hopefully make the Speedo Configuration become their own unique Variables so that you'll easily be able to use them on any build without issues, but for now are bound to the Action Groups. (I will also make this a dedicated sub-assem and configured also for AS-200 and AS-400 gauges)
Will add this in a moment after it uploads... please stand by!
AG1- aka "Spark" switch is ENGINE IGNITION (switch on right side)AG3- (for PC players) Glances Down at the instrument panel, to see everything _(same location; third switch, top row)AG4- aka "IAS" button to Change Speedometer while flying, to IAS readout (button on left side; above Speedo)AG5- aka "GS" to Change Speedometer to Ground Speed (GS) readout (same location)AG6- aka "Metric" to Change Speedometer to display units in KPH (same location)AG7- aka "Knots" to Change Speedometer to display units in Knots (same location)- REMINDER - By default, the Speedo is set to TAS (MPH), so disabling these buttons/AG will return it to that.
AG8- aka "Canopy" switch, will Close the Canopy; it is OPEN by default!Landing Gear- aka "L'D'G Gear" switch, to raise or lower the Landing Gear _(bottom, middle-left)Throttle- aka "THROTTLE - <- -> +" handle, to increase or decrease engine throttle (left of cockpit)- *
VTOL Down* - aka "FLAPS - <- -> +" handle, to lower wing's takeoff/landing flaps (extreme-left, bottom of cockpit) Trim- adjusts Tail Elevator trim amount (Up = nose down; Down = nose up)Yaw- Turns tail landing gear while deployed; actuates Tail Rudder control surface; Flight Yoke controlled.Pitch- actuates Tail Elevator control surfaces; Flight Yoke controlled.Roll- actuates Wing Aileron control surfaces; Flight Yoke controlled.
TAKEOFF
She's got a lot of power, and SOMETHING is buggy with SP, so that makes this bird a huge pain in the ass on the runway!
1) AG8 or "Canopy" switch to Close Canopy
2) AG1 or "Spark" switch to Start Engine
3) Apply MAXIMUM PITCH UP
4) Raise Throttle to about 60%
5) In 1.2sec you are airborne!
6) Raise Gear
7) Increase Throttle until "RPM" reaches MAX indication mark (aka 3200RPM)
LANDING
Mmm...
1) Head down
2) Kiss rump
3) Say a prayer
But srsly, she's really bouncy, has a TON of lift, and glides forever...
1) Throttle to 0% LONG before nearing the Runway
2) Gentle.... Eeeasssy....
3) Mash the Brakes
4) Bounce off the runway a few times
5a) Eventually come to a stop
5b) Nose-plant trying to come to a stop
5c) Run out of runway trying to come to a stop; THROTTLE UP!
TIPS
- [UPDATE: This is NOT as bad NOW, as it used to be (I think my 'spare parts' in designer were somehow to blame)!] I don't know what's wrong with the plane and its tendency to VIOLENTLY pull Left during SANE takeoff speeds. This cropped up when I increased engine HP. I thought it was Landing Gear related, but many many many adjustments yielded no change. CoM was in the middle. No lingering Drag that biased one side. Occurs at any throttle, once you gain enough speed. Only thing I can think of is that blasted "auto-roll" SP likes to induce, which might be causing the Right Gear to make less contact, and thereby pull Hard Left... *shrug*
- It's a fixed pitch prop, but engine is RPM limited to 3200RPMs (using
maxRpm 3232; exact numbers are too 'low' and 3200 yielded 3168RPM). The HIGHER you fly, the LESS throttle you need. Those "29gal" (unchanged from Jundroo's P-51-D" last quite awhile even if you (pointlessly) leave it at 100% throttle, BUT you can easily fly between the 4 islands if you gain altitude and throttle way back, just enough to maintain the 3200RPM. - ORIGINALLY designed for 45deg Propeller Pitch, to keep it true to its "just-over-500MPH" capability; it could achieve roughly 515MPH level flight (any Alt) at that. Increased it to 50deg last minute in order to bring it into modern day speeds. This had the benefit of making takeoff a little easier (required more throttle, meaning less chance of broken prop blades), and also allowed the engine to apply more of its power to the air, so Max RPM needed more throttle as well.
- I tried my best to pull that damn "auto-roll" out. I added a tiny control surface to the Rudder, to act as a Trim. It's currently tuned to fly almost entirely problem-free at 5000FT Altitude. Below that, it will gently roll-left over time. Above that, it will gently roll-right over time. A more-negative value applied to that Control Surface will induce Left Roll (only change it ever so little. 0.0075 will start to gently roll-right all the time!). I originally had a wonky AG setup to allow you to use VTOL Up to Trim it, but it wasn't worth the trouble.
- Not flight-related but... I setup the Attachment Points on all the Instrument Panel parts so that they're modular. Grab any specific GAUGE, and any Label (or other accompanying parts) will come with it; same for using Nudge with "Connected Parts" toggled. I did this so that you can easily make them into Sub Assemblies without having to remove any Attachment. This goes for the entire Cockpit (unless the game screwed that up somehow). The Seat, Levers, Yoke, Camera, Flight Computer (in foot-well), and all Instrumental Panel bits are connected only to the Cockpit part. Canopy is connected to the Fuselage behind it (although, it's Scaled to match that cockpit).
CREDITS
- Whomever @ Jundroo, for making the new P-51-D
- PlanariaLab, for having just so happened to mention in a comment on their "1parts HUD" a link which gave me enough info on what to Google, to figure out all the Label Tags. (Which I made a resource for, and am porting it over to SnoWFLakE0s awesome Guide website)
- SnoWFLakE0s, for a bit of help, and also reminding me about the fact that Labels can be Funkified with FT code
- ChiChiWerx, for the code to calculate Mach speeds based on realistic Air Density/Temperature as altitude increases; tweaked by me after further comparisons against NASA's Mach Calculator at multiple altitudes
- The many SP Forum-goers who unknowingly contributed in one way or another when replying to a heap of threads I've recently posted! :P
ENJOY!
Bonus Pics:
I made an Announcement Thread, and had included these in there. Might as well add 'em here, too!

Unused Label Art - Back when I intended to make it a replica of Tsunami,

but mirroring the text would have been FAR too much work.

Surprised the Checkered trick didnt Z-Fight. Click to embiggen.

Another view of the Instrument Panel. Click for fuller-size.
Specifications
Spotlights
- This craft is curated
- AndrewGarrison 4.1 years ago
- StockPlanesRemastered 4.0 years ago
- ayou2005 4.1 years ago
- PaperPlaneHasDream 4.1 years ago
- YarisSedan 3.2 years ago
- dabestsock 1.1 years ago
General Characteristics
- Predecessor P-51-D
- Successors 2 airplane(s)
- Created On Windows
- Wingspan 38.8ft (11.8m)
- Length 29.6ft (9.0m)
- Height 14.4ft (4.4m)
- Empty Weight 7,005lbs (3,177kg)
- Loaded Weight 7,197lbs (3,264kg)
Performance
- Horse Power/Weight Ratio 0.486
- Wing Loading 29.0lbs/ft2 (141.8kg/m2)
- Wing Area 247.8ft2 (23.0m2)
- Drag Points 2508
Parts
- Number of Parts 305
- Control Surfaces 15
- Performance Cost 1,344
CHANGE LOG:
Updated planes (via XML) will have their name include a
Mk.modifier to function as a "version" system. Updates with lots of changes will receive a full number increment(ie Mk.II, Mk.III ... Mk.IX); minor changes (like bug fixes or label typos) will simply append a lowercase letter(ie Mk.IVa, Mk.IVb ... Mk.IVm)Mk.II
Altitude- This will also readout based on whether the "Metric" button is toggled!MachGsRPM(a numerical display for RPM makes it easier to throttle back for fuel economy, but maintain max speed)materialis now14,6,6instead of18,6,6)[FEET]will change to read[METERS]when the Metric button is toggled@Formula350 can you make the SW-51 with the built you used for this
Nice love it
OMG the first plane I found with a clock
@Formula350 i think for that rainbow color exhaust thermal metal coloring, u might want to use a few slanted diamonds instead of hearts, probably with better visual effects
@SilverStar It's only 2ft shorter than a P-51 :) (32.25' vs 29.6')
It's an optical illusion caused by moving the cockpit so far back.
However, I agree, it looks "off", as you described. I probably would've tapered its tail more, but with being limited by a fixed-dimension cockpit part (ie, can't make the front and back widths different sizes), I had to make due with how it is. Although, looking at that top-down image, I could possibly trim the pieces just behind the cockpit and in front of the tail. But I don't think it'd really help make it look any longer from the side.
Also *le gasp* Thanks to everyone for the spotlights (sorry @Clutch I had meant to thank you earlier!), AND even by Mr... mm I'll avoid a SouthPark reference... AndrewGarrison! <3 And it meeting the standards to get Curated makes me happy, as that was a personal goal I thought I'd miss out on! :D
EDIT: Although, I'd forgotten that updating the XML would require it to be RE-curated. At least I saw it had been! heh
Updated XML with lots of changes: bug fixes, tweaks, and new instrumentation functionality.
I'll move that list to a stickied comment to act as the Change Log post for that specific update, including the updated name that the plane with those changes has, so anyone who already downloaded it at some other point, can reference the name to know which one they have. (Will use the Mk. system instead of version; this being
Mk.II, whereas the original release lacked that.)EDIT: I'm not sure if the new plane is available through the main Download button, or if it's what's in the XML History? The 2D images do not appear to be based on the new XML though, as the Tsunami label still faces the other direction.
@SilverStar that's what she said
Looks a bit too short
I corrected some drag that I didn't know had cropped up after my removal of "spare parts" I had laying around my designer. That, plus 9-bladed propeller @ 35,000FT = Mach 1.00 in level flight :) (35,188ft @ 668mph)
I was incrementally going up altitude levels, which combined with having no speed loss, was slowly lowering the Speed of Sound (thereby, increasing my Mach), and I finally ticked over 1.0..... with 1% fuel left :P
.
While I AM going to be updating the XML shortly, the 9-blade will be absent.
However, the corrected Drag points will be included. As well as:
- Removal of a Sphere in the left gear well that I forgot to delete
- Fixed an itty-bitty bug in my Low Fuel Warning causing the mighty big issue of... it not displaying at ALL. (whoops!)
- Tweaked the PREV and NEXT Targets buttons back to where I had them originally.
- Changed a number of Labels' font on the Instrument Cluster to Roboto, to match the other labels that were using it. (with the exception of Roll/Slip and the Clock, which remain Military, to preserve formatting)
- Decided to change the color on the text for Altitude, to match the rest (
materialis now14,6,6instead of18,6,6)- Addition of a small Digital Display in the empty space under the "Throttle" gauge, which contains:
---- Altitude - This will also readout based on whether the "Metric" button is toggled!
---- Mach
---- Gs
---- RPM (a numerical display for RPM makes it easier to throttle back for fuel economy, but maintain max speed)
- Also added the Selectable Altitude readout from the digital display, to also switch the actual Altitude gauge; Defaults to Feet, "Metric" button converts to Meters (hurray for recycling of code!)
- Fixed the Clock's Numbers label being too far away from the gauge face.
- Fixed Rate of Climb gauge placement
- Micro-adjustments to most of the gauges for symmetry
- Changed Button color to be darker (fixes over-bright when selected)
---- Also changed the Tooltips on Metric and Knots, from "Airspeed: " to " Readouts", as now those (well, Metric) also applies to other displays.
---- And added some Transparency to all the Tooltips, to make them less visually intrusive. (If anyone feels their text should also get made smaller, let me know.)
- Removed a superfluous fuselage part from the cockpit
---- Moved the Attachment Point of the "Retract Gear" warning label from that part, to the dash cowling
- Changed color of Cockpit's "dash" and a piece of Fuselage under the point of the Canopy from the Silver, to the Midnight Blue
- Tweaked <cspace> on the two invisible Warning labels, to help make them easier to read.
- Minor: spun the unused "Tsunami" label around so that it can be read from the "2D" images on the page (assuming they update when a new XML is uploaded)
edit: added additional entries to the Change Log
_edit2: sorry for epic delay in getting the XML uploaded; was under the weather yesterday.
@Formula350 lol yeah, you deserve an upvote and a follow
@Technodium
lol Glad you liked it (and found it!)
.
Though I don't know what he's screaming about, as we're only pulling 15Gs during extreme loop-de-loops! (which I don't have G included as a readout but maybe should? heh). Plus, when squeezing through the bridge structure near Yaeger or the opening in the Pyramid, I've only crashed two or three times... I mean, come on, right?! :}
</s> haha
"Bring your child to work day" omg lol
I'm going to hide my one huge embarassment down in here... lol
The Elevators racing-stripes, took me quite a bit to get them anal-retentively-perfect... only to have the damn things somehow not match the movements of the Wing Elevators they've wrapped overtop of!!! >_<
Just.... just please don't look at it! hahah You should be enjoying the flight from inside the cockpit anyhow! :}
.
If anyone knows how to fix that though, I'm not above accepting the help!