
quatrieme phase: INTERIOR
HOWDY!

Well sorry for the delay, but this phase is a really annoy... ahh i mean really slow and hard. Let's get it on!

This phase contains lot of fine tuning, replacing, nudgeing, and small detailing but if you make it right the result will be magnificent. Let's start with
base of the dashboard a big part where the gauges and the steering wheel gonna be. After that the seats, For the Cube, i need some cheap, but sporty
driving seats and a matching backseat.

Now here comes the pedals, i suggest you to have some pre set 'pedal panel' similar to this one on the picture. Multi select and move it to it's place. Be sure that the offest parts like the pedals, steering wheels, and dashboard elements have 0 mass scale. If you forget this, that could give to the
car bad driving characteristics!

When the pedals are in their place, i usually checking they movement, Sometimes, multi moving can cause glitchy movement at mechanical details.
They works fine so, we happy!

Now let's do something with the dashboard. We need a design. something from the 80's and nothing too fancy, this is an affordable sport sedan, not
a spaceship! First i wanted to go with the magnificent Volvo 480 turbo-s dash style, but unfortunatle it looked odd...
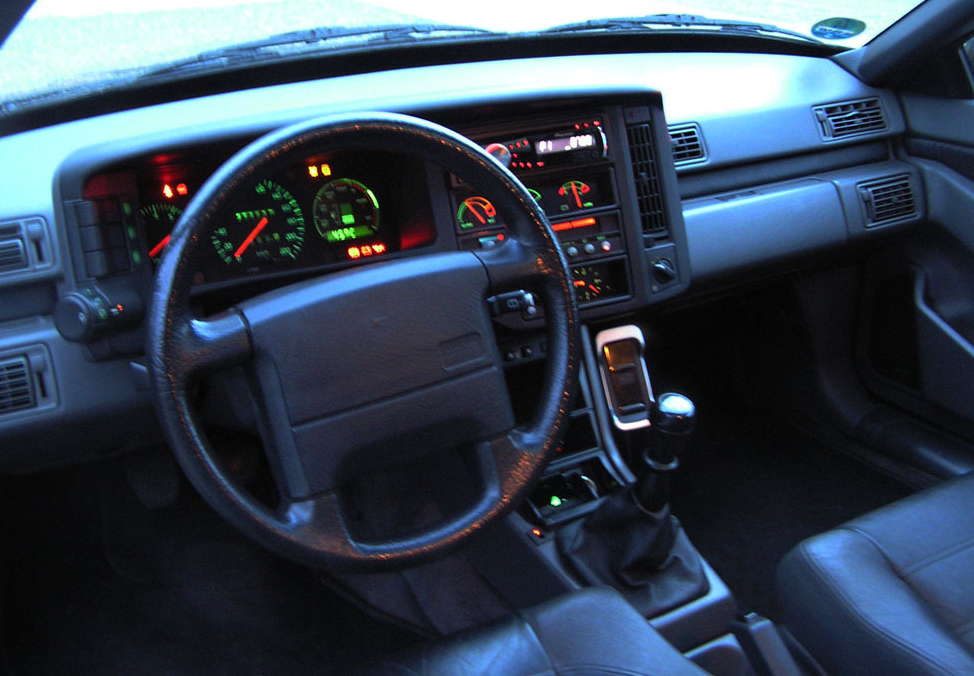

So i stayed with the plan B the Fiat 131 Mirafiori Dash-style. No matter, the building method is always similar. Start to assemble it on a central rod
as you can see on the pics. After some patience multi moving, and raging about the mis-connected parts, i made this simple version:


Next one is the steering wheel. Before the 1.8 and the hollow fuselages, a good steering wheel was respectable detail of the cars. Now it's easier
to make one, but i prefer the old-school 'tubular' steering wheels. At this one i think i did a great job, it really looks like a retro rally car's
sport wheel.

Move the steering wheel with the dashboard to it's place and check that it rolls with no trouble. Add some more details to the central console, slap in a shifter and it's almost over now...

Now i'll try something that i haven't done before. I'm gon'na add some door trim-like thingy. Unfortunetly this one will kick out the part numbers
so badly, that Chuck Norris would be proud.

With parts, SimplePlanes is not really that 'quality over quantity' type game. Cool models have higher
part amount. Just look at the final form

Blyatiful right? :D
Now we can add a roof, a trunk and a rear end. That's pretty basic work, so i don't think i need to show that to you. This interior misery
was 3 day, but i'm finally over it and i can move to a more liked phase. The Detailing.
Thanks for the reading, again sorry for the big pause. Summer kicked in, it's to hot to sit before the computer...
USEFUL TIPS:
-Don't loose your patience, there will be lot of multi-select misclicking, wrong connections, etc... Try to save clicks with the movement scale
number in the fine tuner.
-Pre-made stuffs are key here. Be sure you have some seat, steering wheel, or pedal sub assemblies. Those things can reduce the building time.
And that's important here
@TakicraftCorporation np , you doing a good job :D
@BdidiCorps thanks m8
it'll be an Amazing car....!
@HarryBen47 oh i think i have some patience but not much :D
@TakicraftCorporation How can you make a lot detail like this ?
@HarryBen47 how what?
How ?