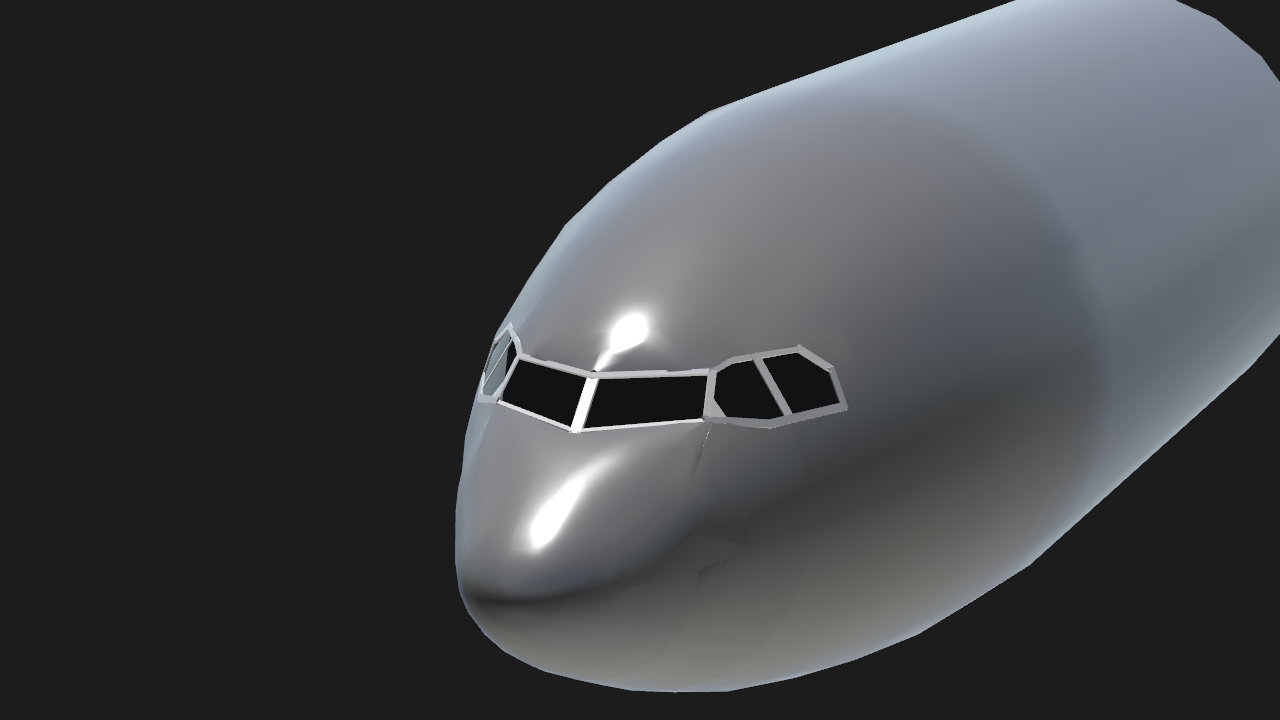
Years ago I made a forum post explaining steps to build a realistic airliner nose section by paneling. As of now, we have fuselage cut technologies, which makes the work a lot less laborious; however, not necessarily easier.
This time I present to you an update on how to build an airliner nose with fuselage cut.
1.
As always, use your blueprint and thin “wires” to create the silhouette of the model. Recommended of equal length for each section until you make it to the cockpit windows and nose tip at the very front.
For wires on the sides, they represent the widest point on the fuselage edge, thus make sure it lines up either in the middle, or make close observations of the real model.
Then, add cross section panes that lines up horizontally with where pieces of the wire connect. For each pane, set either bottom or top fill as 50% so they stay intact. The widest points of the stack must be aligned with the side wires.
IMPORTANT: upper and lower cross sectional pane must have the SAME coordinates.

2.
Start adding the real fuselage to the front, one on the top, and one at the bottom. Make sure each section’s ending point MATCHES the panes you did earlier.
Similarly, each set of two stacking fuselage parts must have exactly the same rise/run, length, and coordinate values. The only difference is your ending and starting cross section dimensions. There should have no crease between the two stacking parts.
Feel free to use different colors to differentiate between those parts.


3.
Once you managed to get to the cockpit windows, pause there.
Use wires again to “draw” the silhouettes to the windows, matching blueprint. I recommend you to do two “drawings” from both the front and side views.


4.
Build the cockpit windows based on your silhouettes with thicker, blocky wires. They need to be tilted to certain amounts.
You should be able to finish the rest with the fuselage parts once you get the hang of it. Add a section of fuselage to the front, disconnect all, then utilize fuselage cutting to bring it to the exact shape you want, depending on the window structures. Reconnect.


5.
Add details. You’re done!

I won’t be working on any new airliners any time soon. But feel free to ask me for help.

@realSavageMan can you make tutorial for cockpit interior
@ToeTips works too
@realSavageMan
How effective is the technique at making fighters
Thanks… it worked really nicely, ~80% done
@ThatRandomCouchPotato Good luck. Remember to add wires
@RealSavageMan
Yes, but my iPad touchscreen and editing is so finicky I’m moves if I breathe too hard. But I’ll try again, so if you don’t hear from me, I probably got it.
@ThatRandomCouchPotato Did you use an appropriate blueprint image and follow closely on my tutorial?
@RealSavageMan
Even though it’s nowhere near completion, could you maybe help me make my Airbus A350-1000 cockpit?
Posted here
@realSavageMan the last generation?
@SheriffHackdogMCPE I might make a 2020 challenger though
also can you plz make a 2001-2007 Dodge Caravan?
@realSavageMan ok
Are you asking how to build an interior? You have to enlarge the fuselage nose section after you finish, then start adding details in it. Check any airliners that I’ve built for reference @PZLAerospace
@realSavageMan I’m not the best builder. I can only build some block planes and that’s it.
@PZLAerospace your question... you tell me. What do you think?
What if you have Cockpit Interor?
@AlbertanPlaneMaker wdym?
@asteroidbook345 uhm hi, yes indeed!
Hey babe new airliner tutorial dropped
Print screen
Thanks lol, im actually Desantis @SONYPVM9041QM
@realSavageMan also the picture you use for your profile is amazing
Glad to hear. @SONYPVM9041QM
Wasn't planning on making an airliner but ¯_(ツ)_/¯ I will now
@jamesPLANESii Thanks dude! (look closely that there's still some crease underneath the windows though)